What you need in your saddle bag:
Flats don’t usually happen near a bike shop with an empty work queue. When you get a flat, you’ll want to have these items handy:
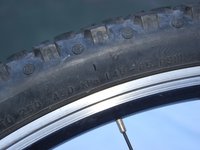
A spare tube for your specific wheel and tire. The wall of your tire should be imprinted with its size. Most newer bikes have a metric measurement (“700c x 25”), while older and specialty bikes have imperial inch measurements (“27 x 1.25”). If you’re not sure what size you need, check your owner’s manual, Google your bike model, or stop into your bike shop for help buying a couple tubes.
Tire levers. Wirecutter recommends Pedro’s Tire Levers, and so do I. Some tubes and patch kits come with free levers, though, and they’re usually good enough, if you’re not doing other bike work. If you’re caught without any levers, you might be able to use your wheel’s quick release lever in a pinch (something I learned from that guide!)
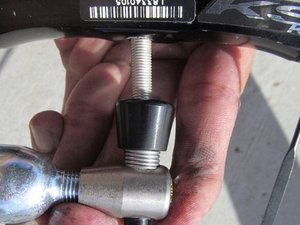
An inflator. Once your tire is off and your busted tube out, you’ll need a way to get air into your new tube. You can buy an adapter for CO2 cartridges, or a more all-in-one inflator if you have room. If you go that route, buy more than one cartridge so you can practice (ask a guy who blew out an entire cartridge when he tried for the first time, while his ride partners looked on in despair). We have a guide to using a CO2 inflator with your bike tire with good details, like how your valve will probably get frozen, but that is okay.
The most reliable and sustainable solution is a hand pump, like Wirecutter’s recommended Lezyne model. Mount it to your bike or toss it in your backpack, if you can.
A dollar or two. If your tire experienced a bad gash or rip, a dollar, placed between the tube and the tire gap, can be a stop-gap solution so you can make it to your destination. Otherwise, having a buck or two in your bag means you can probably catch the bus or trolley home, when all else fails.
Doing the work

Removing the wheel. It’s easier to take your front wheel off than the rear, and it’s easier if you have brakes that press on your wheel rim (i.e. rim brakes), rather than newer disc brakes. But you can do it, whichever scenario:
- Rim brakes: Some bikes may have a quick switch to release the brakes, others may require squeezing and detaching a cable. If you’re removing the rear wheel, see this guide step to avoid damaging your gears or derailleur while removing the wheel.
- Disc brakes: The steps are similar to rim brakes (see steps 1-3 of this guide), but with one important caveat: if you bought a bike with hydraulic disc brakes, do notallow the hand lever for your brakes to be pulled while you have your wheels off. Your pistons can get seized up by doing this. You can fix pulled-out pistons, but it’s not fun.
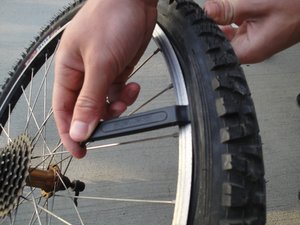
Remove the tire. Start from Step 4 of our inner tube replacement guide. Deflate the tire by pressing on the nub inside the stem. Work the business end of a tire lever (or quick-release lever) between the rim and the edge of the tire, then lever the tire out of the rim. If you’re using a tire lever, there should be a notch or hook on the other side that can latch onto one of your spokes, keeping the other end inside the tire. Either way, run a tire lever around the wheel, releasing the tire from the rim as you go. Once you’ve got one side released, the other side should come out with your hands.
Inspect the tire. I learned this lesson the hard way, so let me spare you that: always check your tire and try to find the thing that caused your flat, before you put a new tube in. All that little bugger wants is for you to inflate a brand-new tube right up against it for another shot at your dignity.

Replace the tube and seat the tire. After that, you’re essentially doing the reverse operation, with a few tweaks. Put a little bit of air in the tube before you place it into the tire. Follow Park Tool’s tire-change recommendations: check if your tire has a rotational direction (though not all do), and line up the stem on your tube with the spot on your tire where it tells you the maximum inflation amount. Tuck one entire side of the tire wall (bead) into the rim, then work the other side’s bead in, starting on the far side of the wheel from you. If you use tire levers, be gentle, so as not to pinch the tube. Look for any bulges or dents, which could be signs for bad seating or a twisted tube; start over if you can’t fix them with your hands.
Put the wheel back on and inflate. If you’re using a CO2 inflator, follow Christopher Tiran’s guide from step 10, and don’t put the tire back on the bike just yet. Use your fingers as a rough guide, comparing the springiness against your touch to your other tire, and err on the side of not over-inflating and popping another tube.
If you’re going to use a hand or stand pump, put the wheel back in (reversing your steps taking it off), then inflate it close to the maximum level on the tire (stamped on the side of the tire). If you’re using a hand pump and just need to get to work or your home, it’s okay to stop a good bit short of the maximum; it gets hard toward the end. If you’re using a CO2 cannister, you should stop when your tire feels firm to the touch.

Patch the old tube. If the deflated tube doesn’t have any large holes or rips, you can likely patch it and keep it as your new spare. The patches in a good kit (like the Rema TT 02 kit recommended by Wirecutter) are very strong. A common bike-shop aphorism is that a good patch is stronger than the tube itself. Jorge Saro’s iFixit guide to patching explains and illustrates the practice. For lots of small tips on patching, and background knowledge, read the Sheldon Brown page on patching. Read the Sheldon Brown page on any bike topic, really. It’s time well spent.

Share:
Nutrition-Hacks
SPD vs. SPD-SL